Steps of Creating A Custom Camera using CameraX Library in Android
Comparatively, building a custom camera with Android’s CameraX library is “easier” than with the previous android.hardware.Camera API. android.hardware.Camera had little control over exposure, focussing, and camera settings. It was devoid of many sophisticated features seen in contemporary cameras. The goal of Android Jetpack, which includes CameraX, is to simplify and standardize camera development across various Android devices.
Below are steps you can use when creating your custom camera.
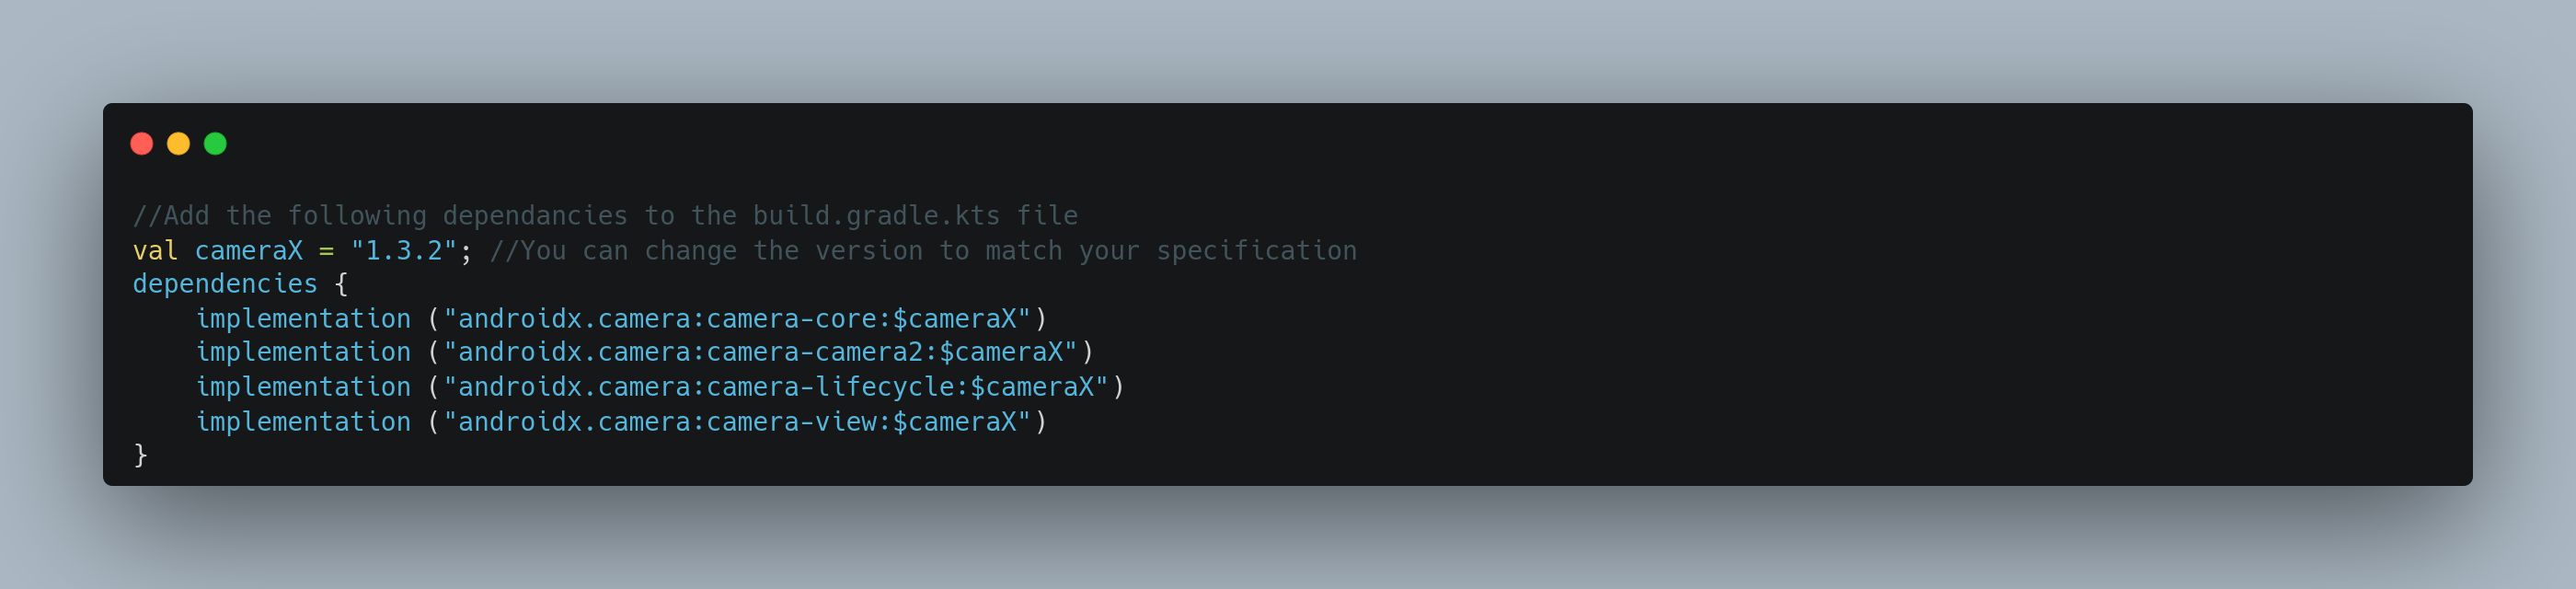
Step One: Dependancies
Add the following dependancies to the build.gradle.kts file. Sync the project to download the libraries to your local set up. You might experience some configuration issues, in that case you can always go through/download the source code as on Github.
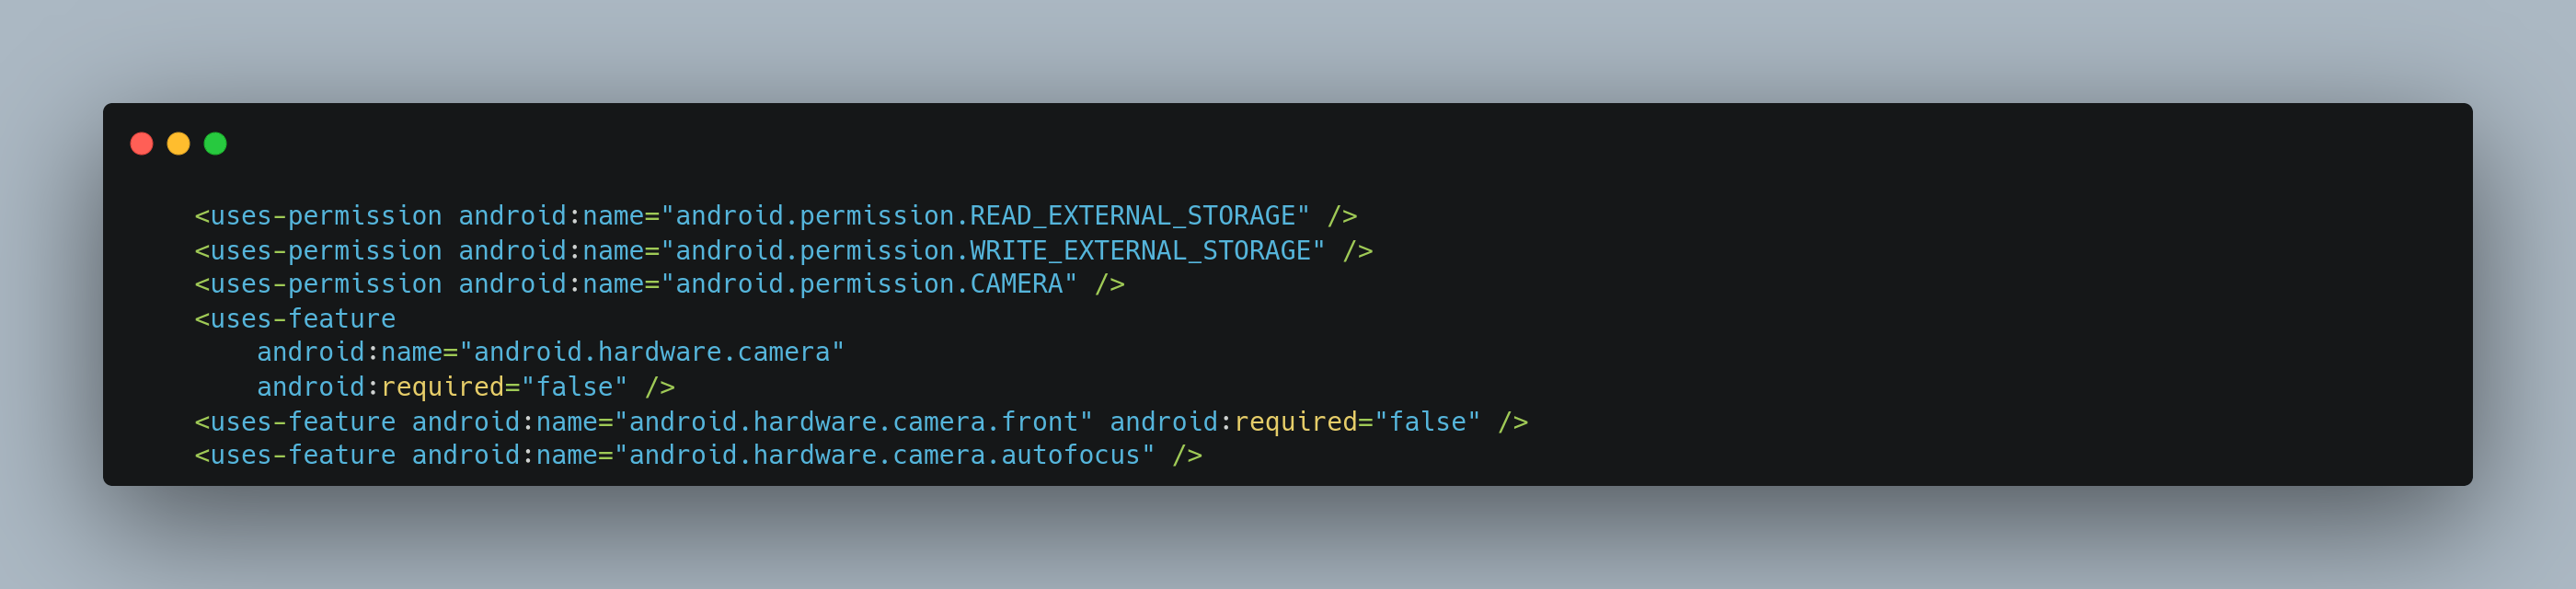
Step Two: Set up the permissions
Add the following permissions on your AndroidManifest.xml file.
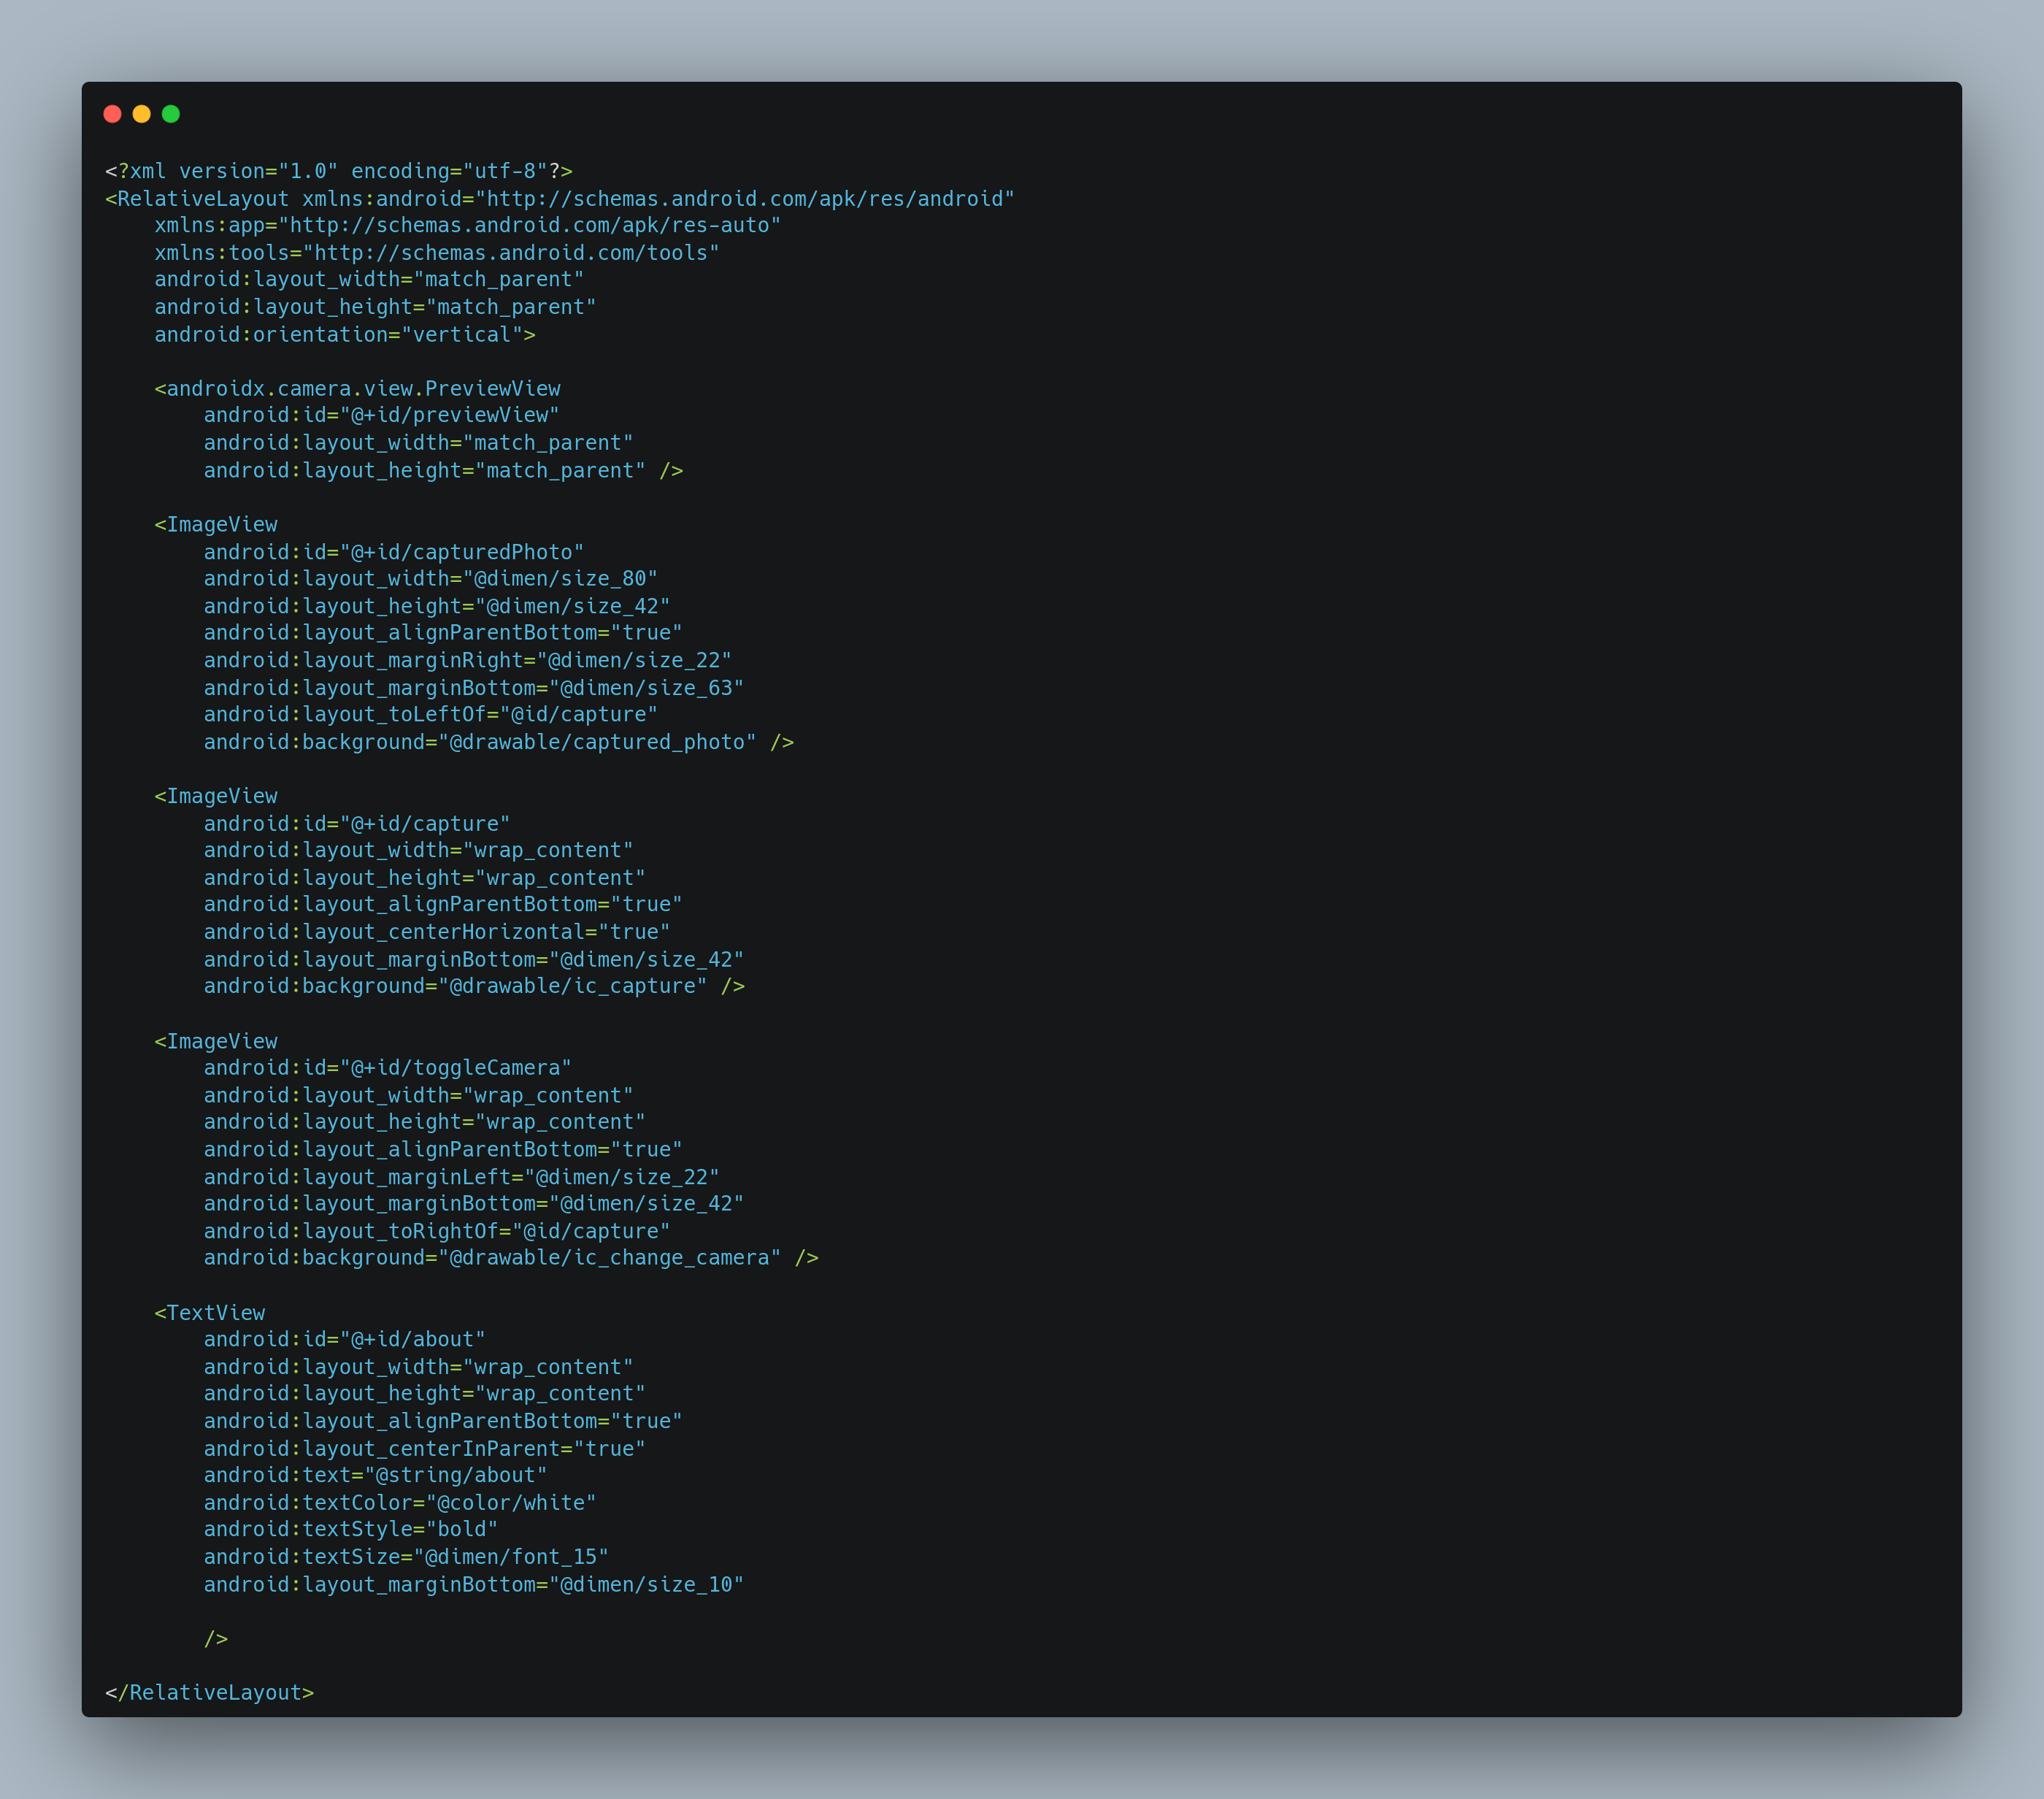
Step Three: Set up the Layout
Include the PreviewView in your layout file.
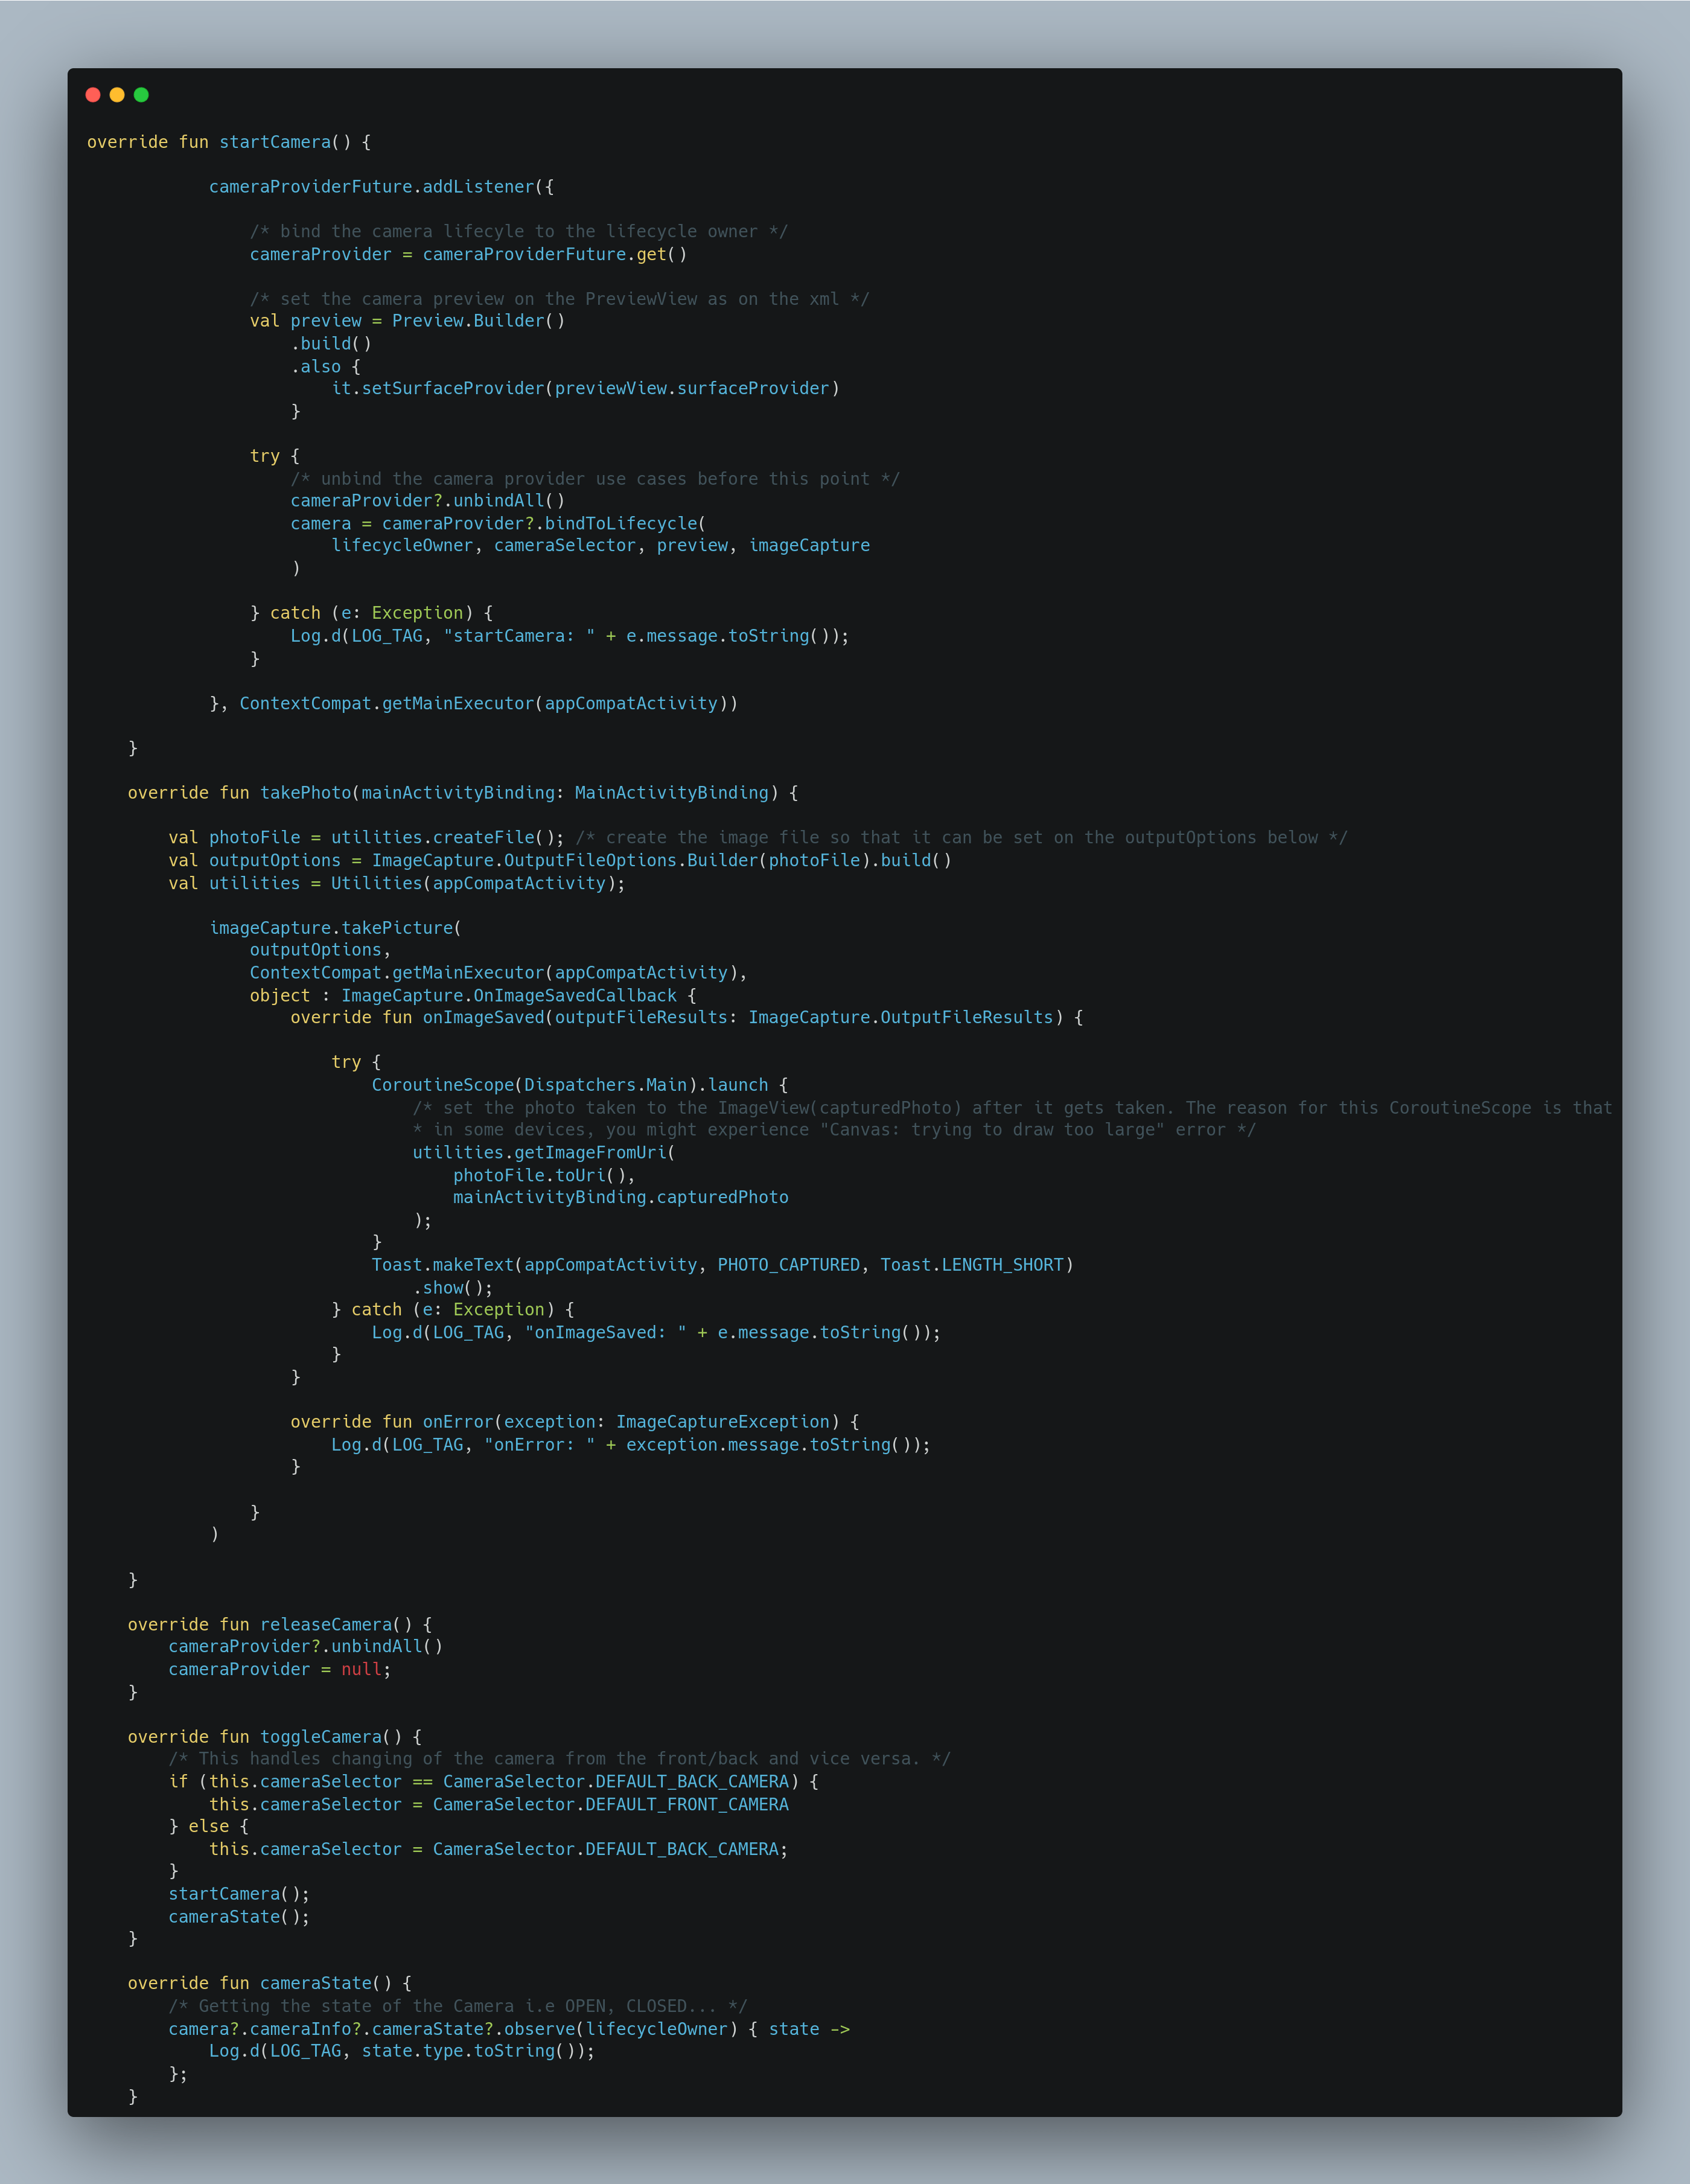
Step Four: Jump to the code
In this case we used an Activity, the same can also be done for Fragments. The full codebase can be found on Github.
Final output
Find the final output in the YouTube Video below.
Symatech Labs is a Software Development company based in Nairobi, Kenya that specializes in Software Development, Mobile App Development, Web Application Development, Integrations, USSD and Consultancy.